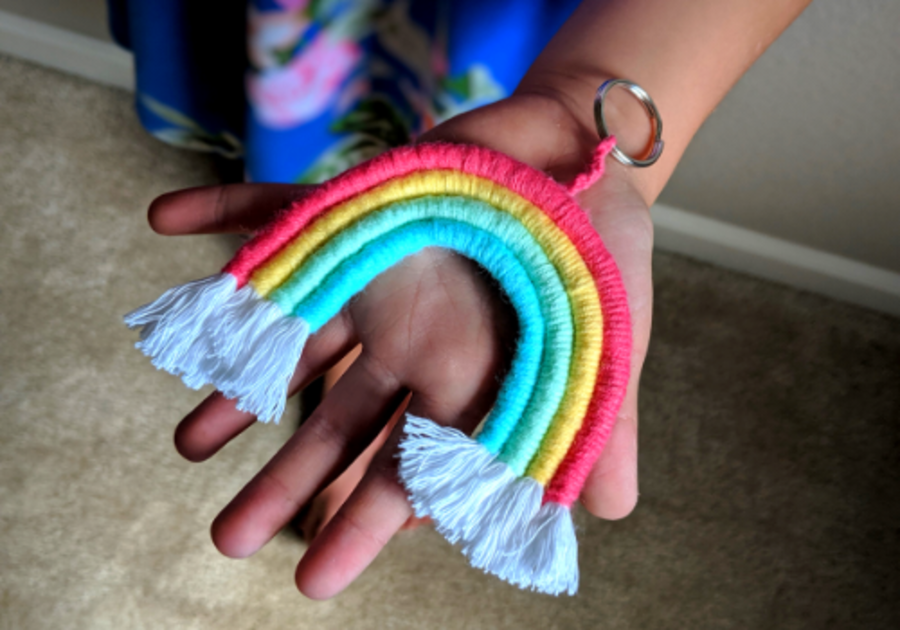
As the start of school approaches, why not help your kids add some flair to their backpacks with this totally cool DIY Rope Rainbow Keychain? These keychains are not only simple to make but also a blast for the kids! Watch their faces light up with joy as they proudly attach their colorful creations to their backpacks. Get ready for a fun-filled crafting adventure!
Rainbow crafts are all the rage in our household these days. Not only are the cheerful colors fun to look at, but rainbows are a symbol of hope after darkness and a great reminder that good things are on the horizon. We've brightened up my daughter's backpack with a rope rainbow keychain as a reminder to persevere this school year, and you can too! Here's how:
Rope Rainbow Keychain
Materials:
- Rope - we used 4 mm
- Wire - we used 18 gauge
- Yarn - in a variety of colors
- Hot glue - parent should help, these can get pretty hot
- Optional - Hardware to hang your rainbow
Instructions:
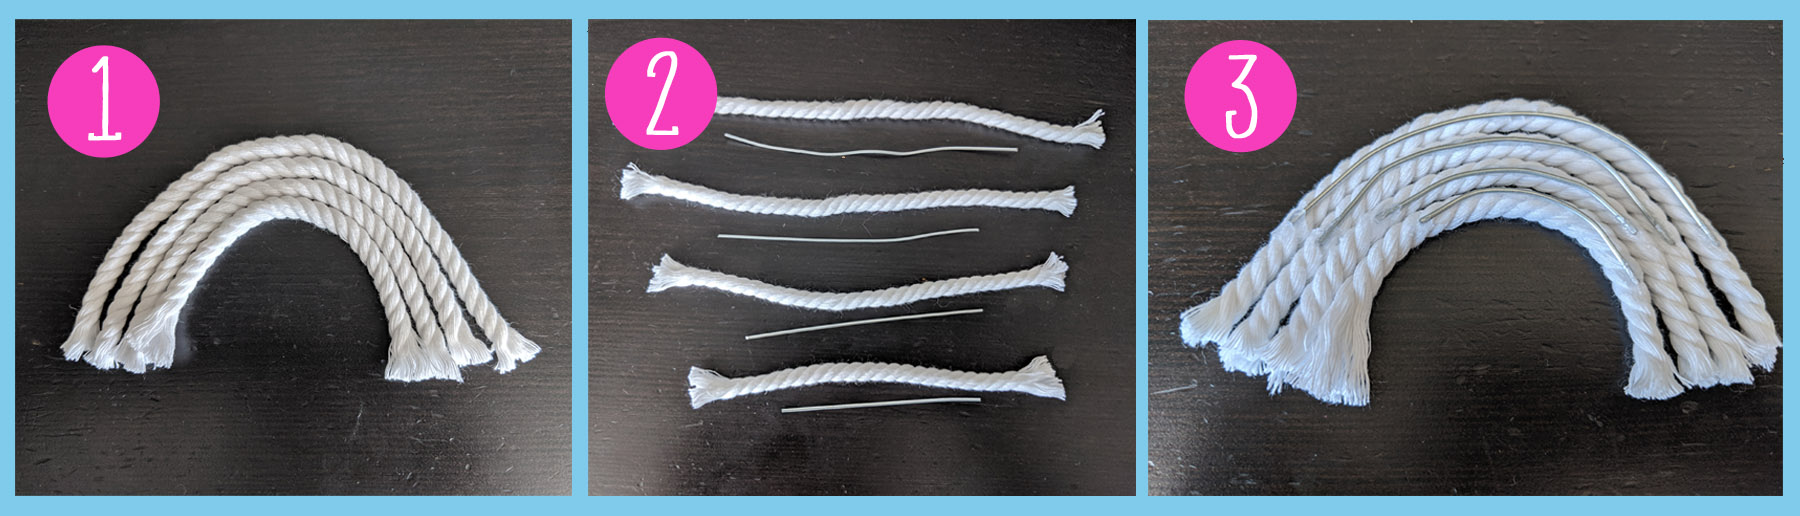
Note: Step numbers correspond to photo numbers below:
- Decide on the size of your rainbow. Cut the rope as shown in photo No. 1. For our keychains, we decided on 4 pieces of rope with the smallest one being cut to 4 inches long, with each of the other pieces slightly longer.
- Cut one piece of wire for each piece of rope. The wire should be smaller than the accompanying rope piece. If you're scaling your design like ours, I would recommend cutting the wire such that at least 1" of rope is free on both sides.
- Bend the wires to form arcs and glue each wire directly to each corresponding strand of rope.
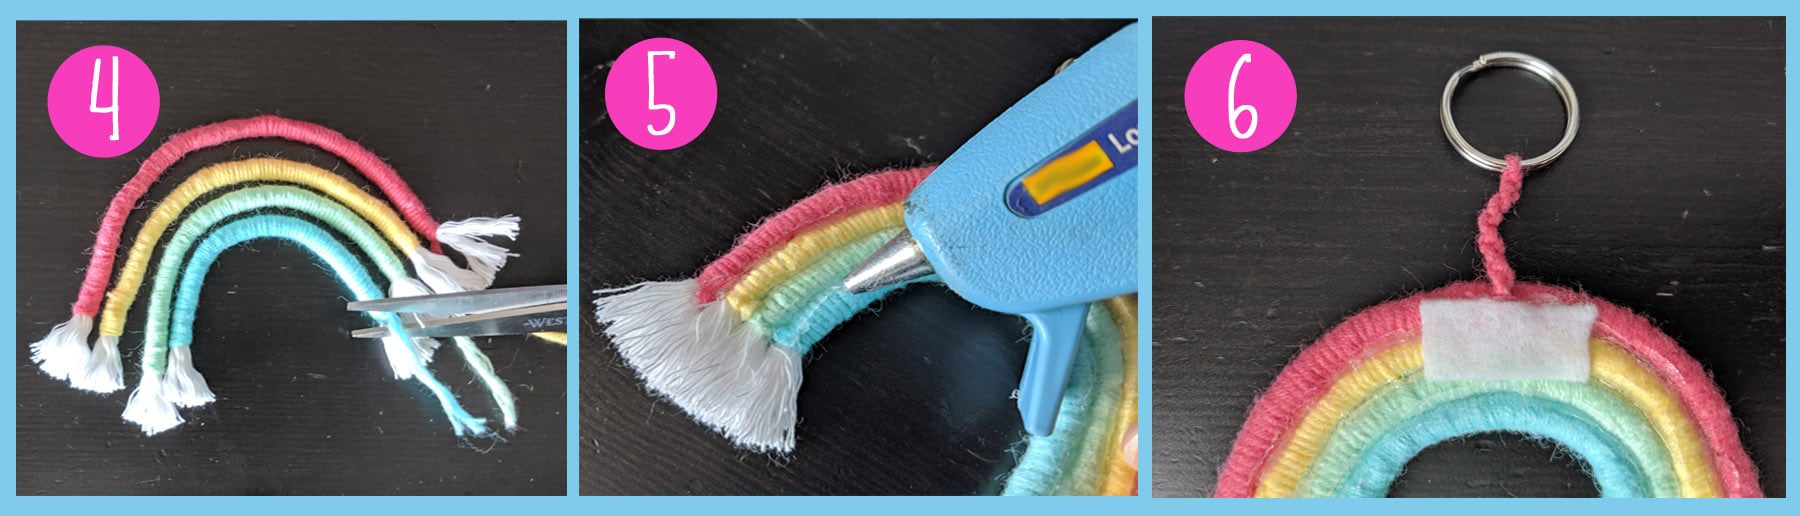
- Wrap yarn around the rope, one color at a time, leaving some of the frayed ends of the rope exposed. Tie up the ends and cut off excess yarn.
- Once all ropes have been covered with yarn, hot glue the arcs together.
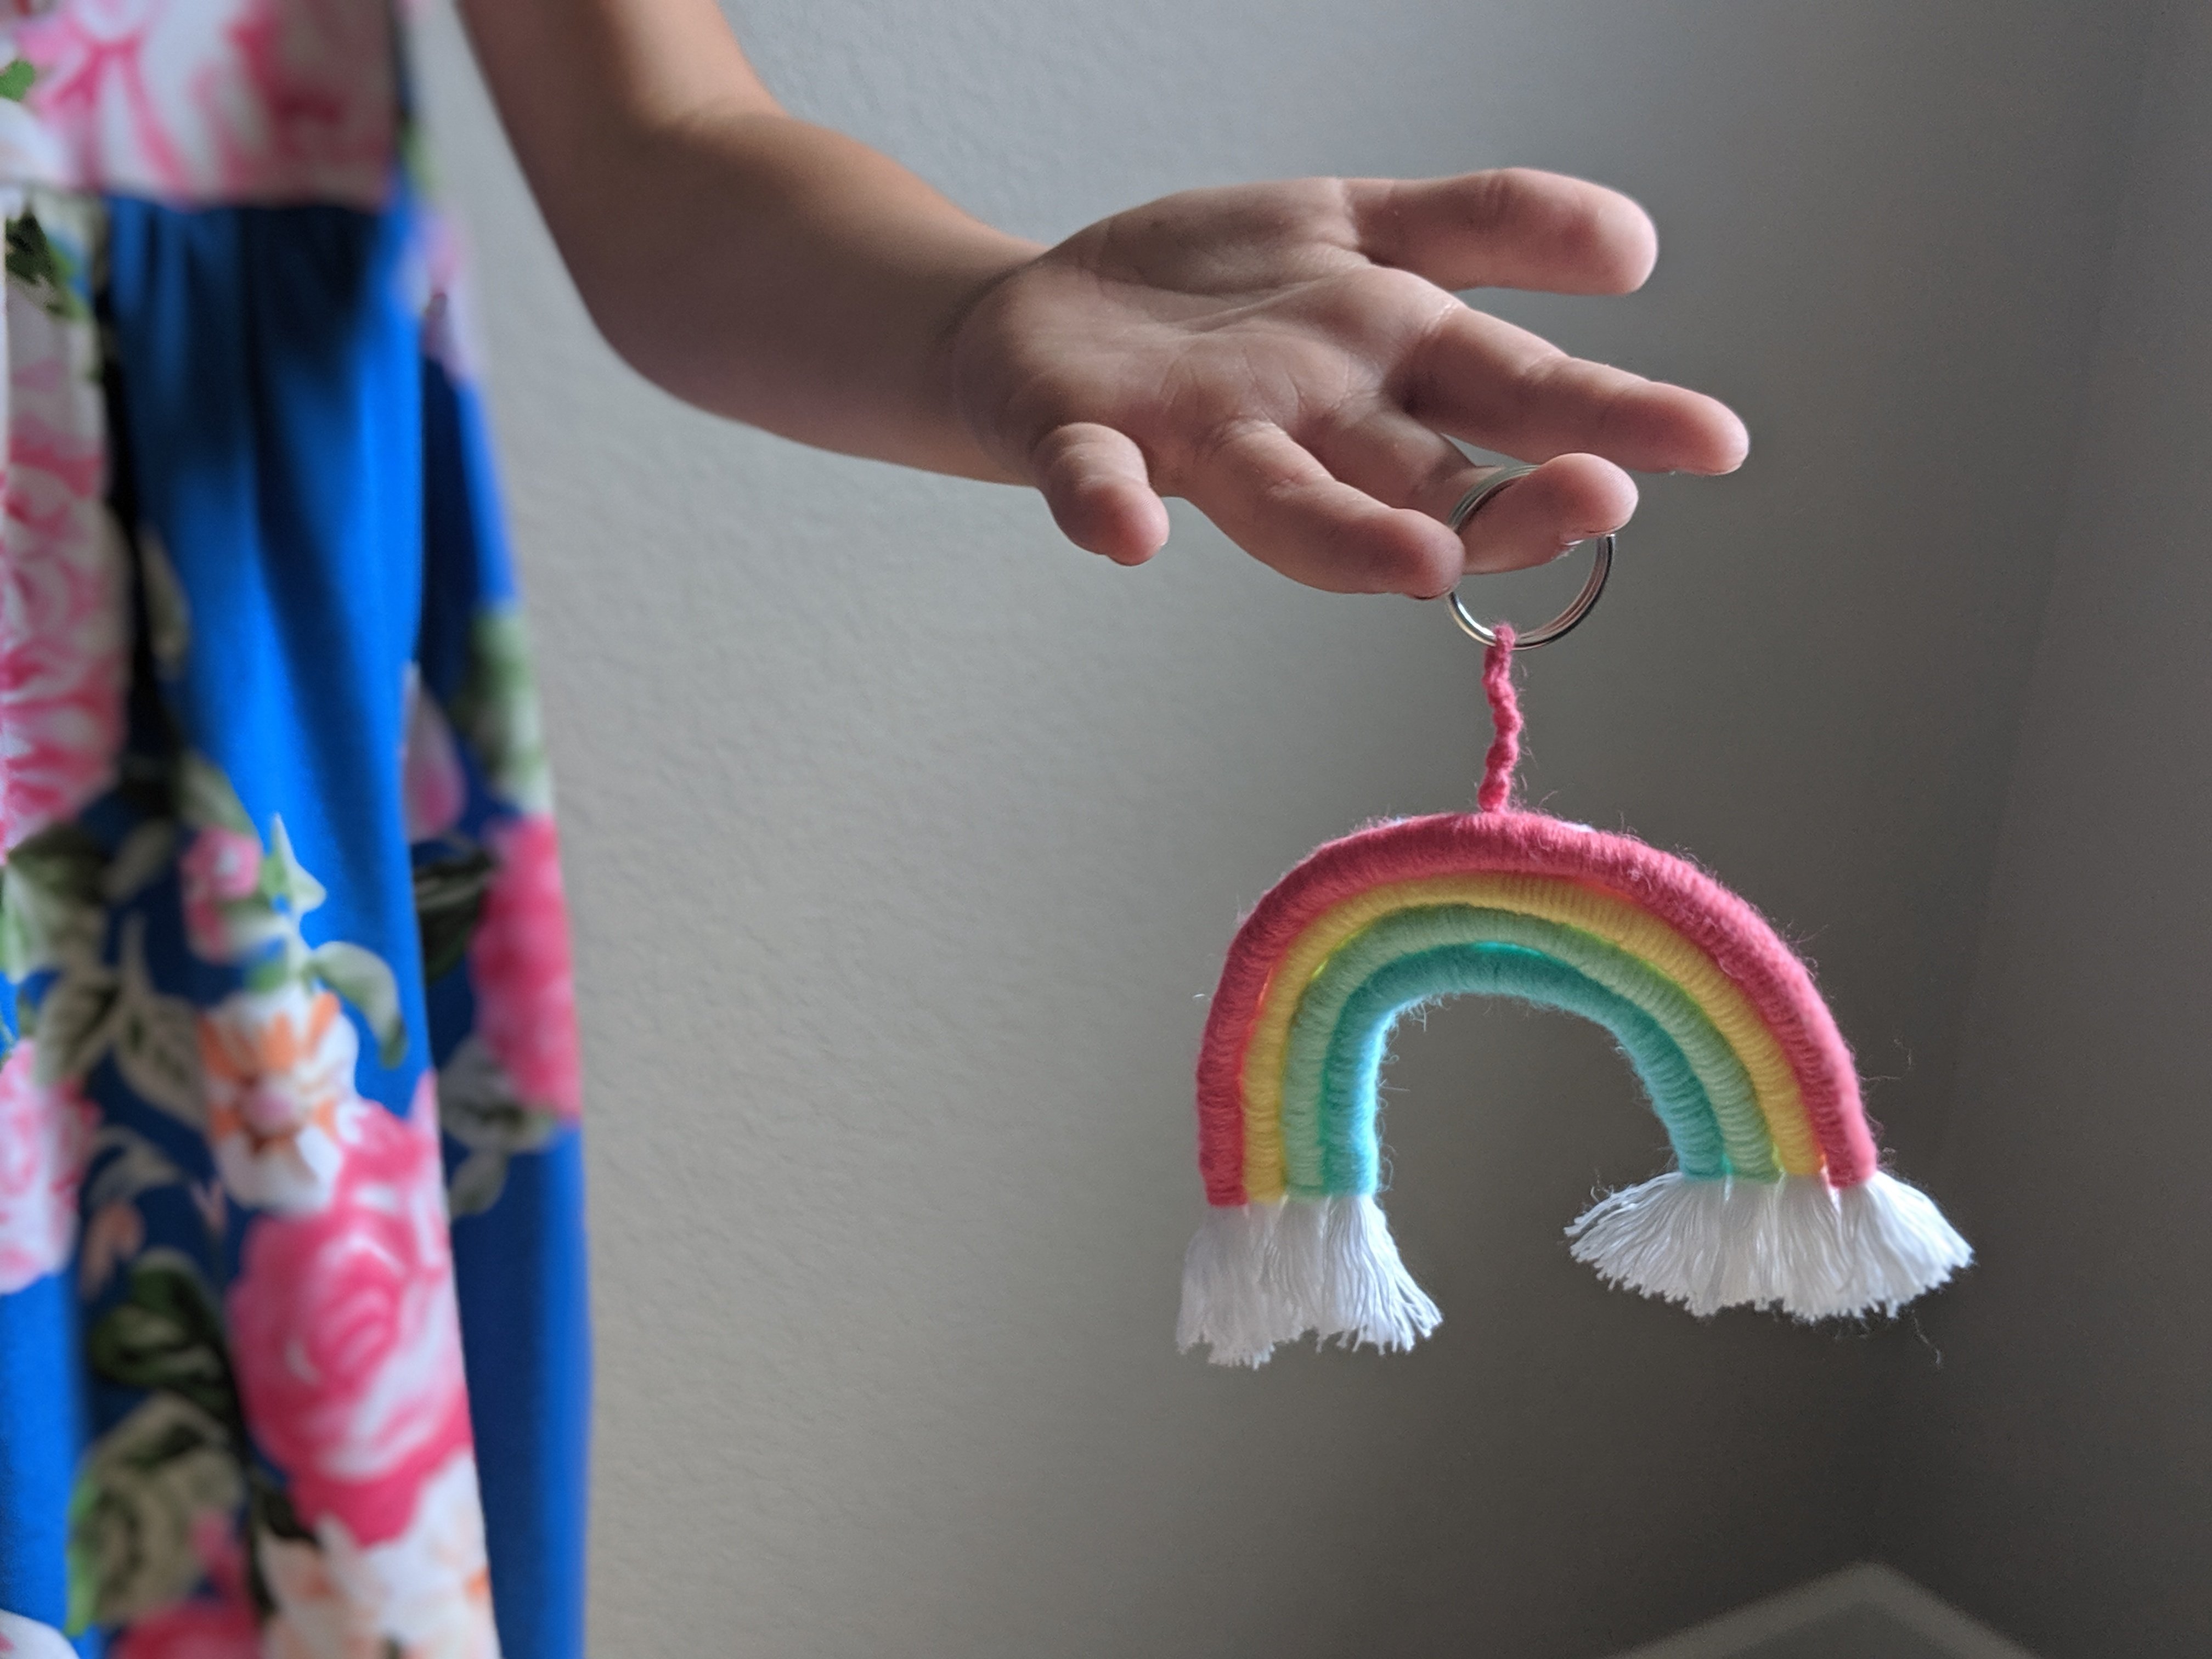
- Optional: Transform your rainbow creation into a magnet, keychain, or wall hanging by adding the appropriate hardware. In our example, we've attached a keychain ring with extra yarn and a piece of felt.
MacKID Tip: Get creative! Switch up your rainbows by trying different color combinations and rope sizes.
Want to show us what you've made? We'd love to see your works of art! Be sure to tag @macaronikid on social media so we can see your rainbow creations.
This previously posted article was updated July 17, 2023 by Macaroni KID Conejo Valley - Malibu - Calabasas